Configure subform in an app
Follow these steps to get started with integrating subforms in your Altinn App.
1. Introduction
A subform is a form that is part of another form. You set up subforms in the associated tables. This guide explains how to create a table for a subform and configure the subform to be linked to it.
2. Configuring the Subform
The setup in this section is mainly done from the Utforming page in the app’s workspace.
Navigate there by clicking on Utforming in the top menu.
- Add a table for the subform
Select Tabell for underskjema from the component list on the left in Avansert.
When the table is added, a configuration window opens to guide you further. - Create a subform
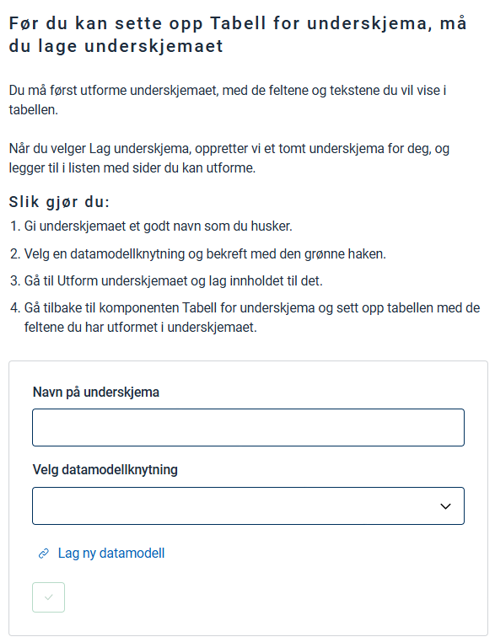
Follow the instructions in the configuration window to create a new subform or select an existing one.
Creating a subform - guide If you need to modify the data model for the subform, navigate to Datamodell in the top menu and select the data model from the dropdown list. In ther Metadata tab, you can specify the number of data elements the user can/should add to the subform. Click Generer to save the changes. - Select the subform on the Utforming page
Select the subform in the dropdown menu linked to the table. Alternatively, you can navigate there by clicking on Utform underskjemaet in the configuration window. - Set up the subform
Add the components you want. The Knapp for å lukke underskjema component, which closes and navigates back to the main form, is automatically added to each page. Remove it manually on pages where it is not needed. - Add columns to the table for the subform
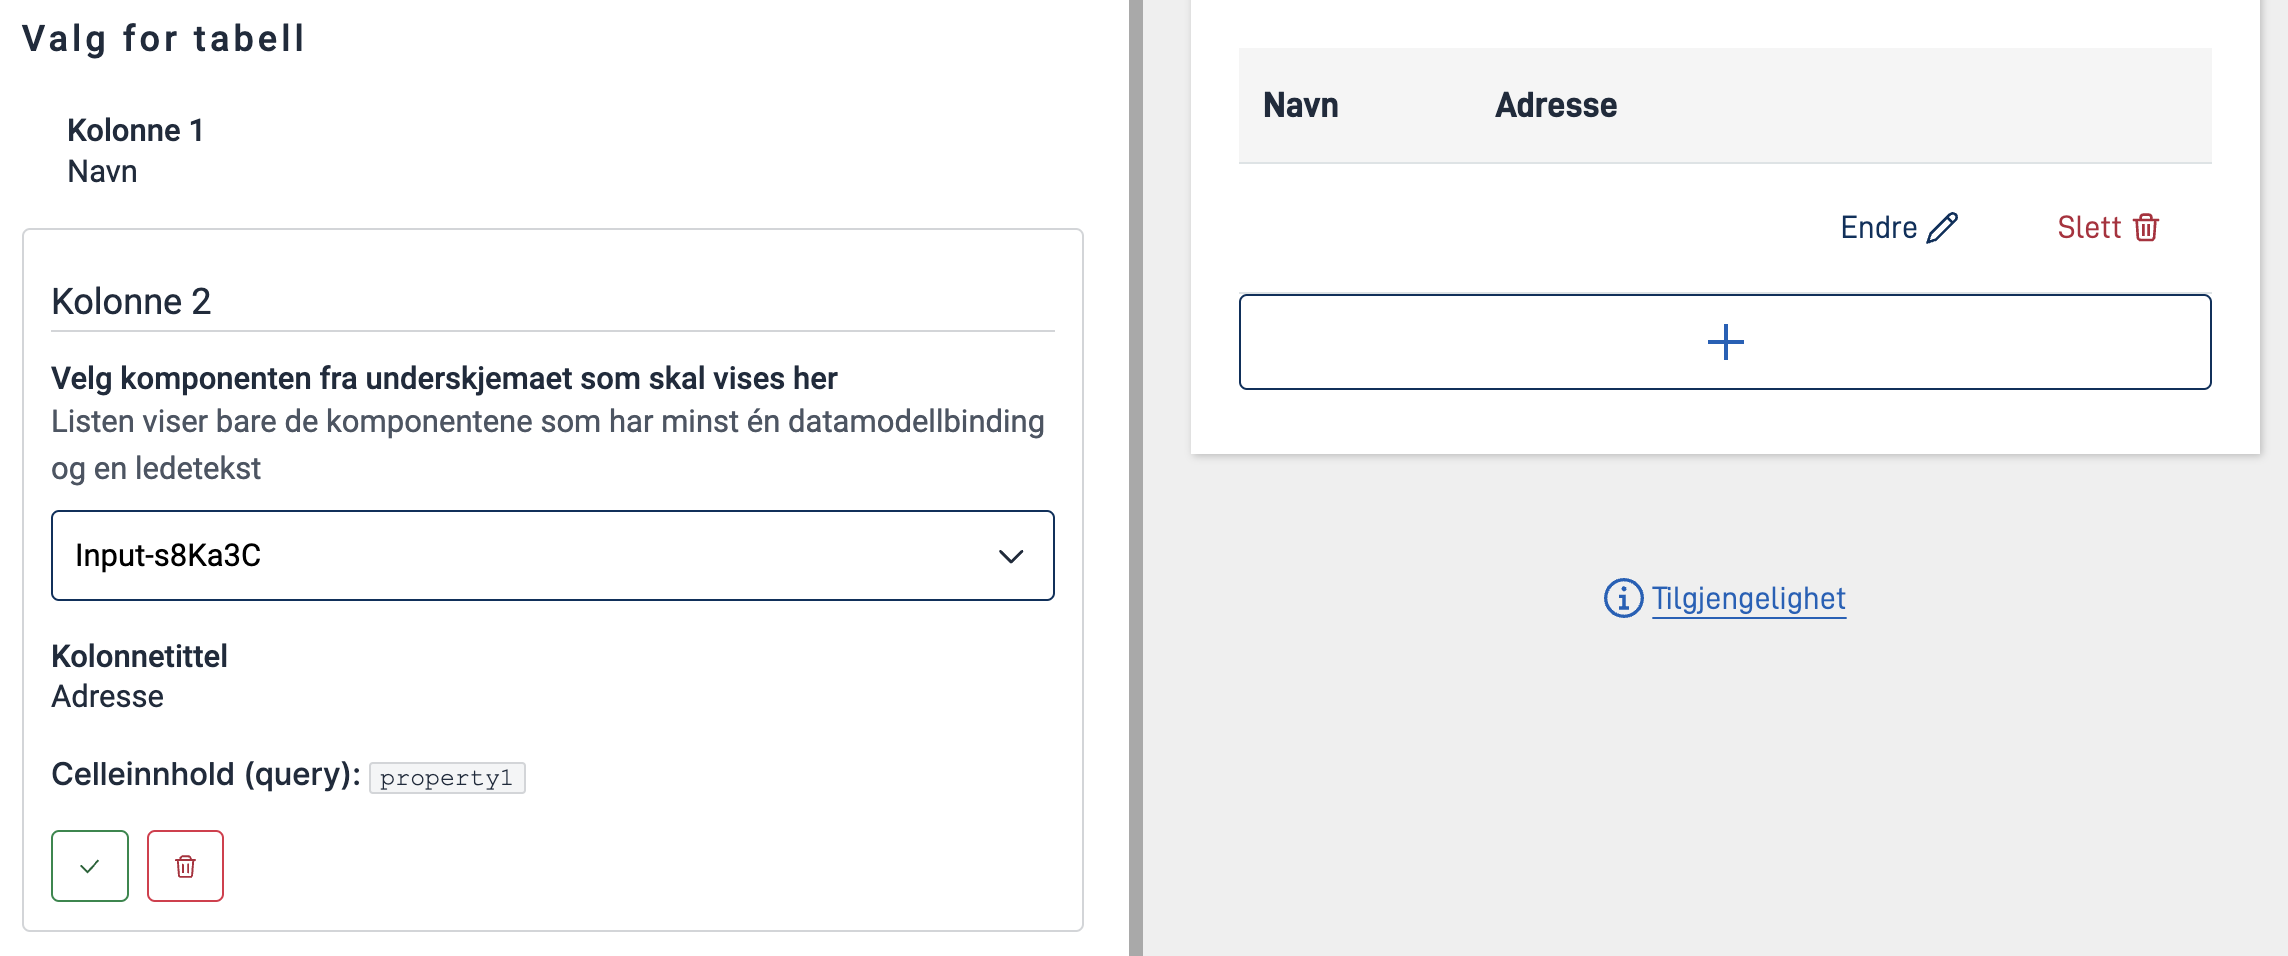
Navigate back to the main form and click on Tabell for underskjema. Open the accordion Tekster and add the desired columns. - Configure the columns
Choose the number of columns you want in the table. Select a component from the subform for each column. You can add a custom title, otherwise the component’s title is used. Click Lagre when you are done.
Column configuration
This documentation is a work in progess. Subforms are currently in preview-release.
Subforms are contained in a subform table. Let us go through configuring a subform table and the subform contained within.
- Create a data model for the subform.
- You should now see the three files under
App/model. The c# class, the json schema and the xsd. - Set appLogic.allowInSubform to true in applicationMetadata.json.
- Create a folder under App/ui with your desired subform name.
- In the subform folder, add a
Settings.jsonfile and a folder called layouts. - You can add page layouts to the layouts folder as you would for the main form.Subforms do not support attachments, and nesting subforms is not allowed (subform in subform).
- The Settings.json file for the sub form is configured as normal.
- The button which closes the subform must be a CustomButton with a
closeSubformaction. Optionally you can also trigger validation before exiting.{ "id": "subform-exitbutton", "type": "CustomButton", "textResourceBindings": { "title": "The button title" // Defaults to `general.done` if omitted }, "actions": [ { "type": "ClientAction", "id": "closeSubform", // Validation is optional "validation": { "page": "all", "show": ["All"] } } ] } - Add a layout set to
layout-sets.jsonwith the data type of the data model from step 1. Choose your subform folder name as the id.{ "id": "subform-layout-folder-name", "dataType": "your-subform-dataType" } - Navigate to the layout for the page in the main form in which you want to add the sub form table.
- Add
Subformwith the configuration you want. Example:{ "id": "subform-test", "type": "Subform", "textResourceBindings": { "title": "subform-test.title", "addButton": "subform-test.add" }, "layoutSet": "subform-layout-folder-name", "showAddButton": true, "showDeleteButton": true, "tableColumns": [ { "headerContent": "subform-test.name-header", "cellContent": { "query": "Name" } }, { "headerContent": "subform-test.age-header", "cellContent": { "query": "Age" } }, { "headerContent": "subform-test.extrainfo-header", "cellContent": { "query": "ExtraInfo", "default": "subform-test.extrainfo.default" } } ] }
Subforms can have their own summary page and be a part of the main forms summary.
To add a subform into the main forms summary, use the subform id from the main forms layout, and the type “component”.
- Configuration options for subform layout
Options for subform layout configuration

