How to setup an integration between an Altinn App and Maskinporten.
This guide shows how to set up an Altinn app to make authorised requests with Maskinporten on behalf of the app owner, as opposed to the active user.
Maskinporten automation in Altinn Studio
Apps using Altinn App v8.3 or newer can enable the default service owner scopes altinn:serviceowner, altinn:serviceowner/instances.read and altinn:serviceowner/instances.write from Altinn Studio. Use the button in the Maskinporten tab or add the scopes from the scopes view in app settings.
altinn:serviceowner indicates that the client is a service owner system, while altinn:serviceowner/instances.read and altinn:serviceowner/instances.write grant access to read and write instances as service owner.
Apps using Altinn App v9 require these default scopes. Altinn Studio adds them automatically if they are missing.
New apps created in Altinn Studio get these default service owner scopes automatically.
The app must also authorise the service owner in App/config/authorization/policy.xml. New apps include this rule in the app template. For existing apps, add or update the [org] rule so it grants read and write.
Altinn Studio uses your signed-in Ansattporten access to find the Maskinporten scopes you can add for the service owner organisation.
If you cannot see any scopes in Altinn Studio, your user may not have access to administer clients for the organisation. See what to do if you do not have access, contact the person who administers Maskinporten access for your organisation, or contact Altinn servicedesk.
Scope changes take effect the next time the app is built and deployed.
Deployment and credentials
When an app with Maskinporten scopes is deployed, Altinn Studio includes the selected scopes in the app build. After deployment, the app can use the built-in Maskinporten client with the scopes selected in Altinn Studio.
You do not need to handle client credentials, JWKS generation, rotation, or app configuration yourself for the standard app setup.
Usage
The app automatically includes the built-in IMaskinportenClient which can be injected into your services.
Configuration paths
The client automatically looks for a Maskinporten configuration at the default path “MaskinportenSettings”. With the Altinn Studio scope setup, this configuration is available to the app after deployment.
Use the default path when scopes are selected in Altinn Studio. Custom configuration sections are not populated by the Altinn Studio scope setup, and should only be used with manual or legacy setup.
Authorising HTTP clients
Typed and named HTTP clients can be authorised with the available extension methods, as illustrated below.
App/Program.cs
void RegisterCustomAppServices(IServiceCollection services, IConfiguration config, IWebHostEnvironment env)
{
// ...// For external APIs that require raw Maskinporten tokens services.AddHttpClient<CustomClient1>().UseMaskinportenAuthorization("scope1", "scope2");
services.AddHttpClient("named-client1").UseMaskinportenAuthorization("scope1", "scope2");
// For Altinn APIs that require Altinn tokens (exchanges Maskinporten token) services.AddHttpClient<CustomClient2>().UseMaskinportenAltinnAuthorization("scope1", "scope2");
services.AddHttpClient("named-client2").UseMaskinportenAltinnAuthorization("scope1", "scope2");
}
Manual usage
If you need to fetch a Maskinporten token manually, you can inject the IMaskinportenClient in your service and retrieve tokens with the GetAccessToken and GetAltinnExchangedToken methods.
publicclassExample(IMaskinportenClient maskinportenClient) : IProcessTaskEnd
{
publicasync Task End(string taskId, Instance instance)
{
var maskinportenToken = await maskinportenClient.GetAccessToken(["scope1", "scope2"]);
var altinnExchangedToken = await maskinportenClient.GetAltinnExchangedToken(["scope1", "scope2"]);
// Do something with the tokens... }
}
Legacy manual setup
The following manual setup is only needed for legacy apps or special cases where Altinn Studio should not provision the Maskinporten client.
Some existing apps use a manually created Maskinporten client from Samarbeidsportalen and read the client credentials from the service owner Azure Key Vault. This setup often uses app-specific secret prefixes because the Key Vault is shared by several apps, for example myapp--MaskinportenSettings--ClientId, and app code may bind the built-in client to a custom configuration path such as myapp:MaskinportenSettings.
To move such an app to Altinn Studio-managed credentials:
Check which scopes the existing Maskinporten client is configured with in Samarbeidsportalen, and which scopes the app requests in code.
Add the same scopes to the app in Altinn Studio. If the app only needs service owner access to Altinn instances, use the default service owner scopes.
Update app code that explicitly binds Maskinporten configuration to a custom path. Remove the custom ConfigureMaskinportenClient("...") call, or change it to use MaskinportenSettings, so the app uses the configuration supplied by Altinn Studio.
Build and deploy the app to TT02. The deployed app will receive credentials for the selected scopes at the default MaskinportenSettings configuration path.
Verify the app in TT02. Test that it can retrieve a Maskinporten token, and that calls requiring exchanged Altinn tokens still work.
Repeat the deployment and verification in production.
After production is verified, remove the old app-specific Key Vault secrets and the custom Key Vault configuration if they are no longer used. Do not delete the old Maskinporten client before you have verified that no other app or integration uses it.
Keep any Azure Key Vault setup that the app uses for other secrets. If Maskinporten credentials were the only values the app read from Azure Key Vault, the Azure Key Vault configuration provider and related app settings can be removed after the migration is verified.
If the app already uses MaskinportenSettings from Azure Key Vault
After deployment, the app can temporarily have two configuration sources for the same keys:
the configuration Altinn Studio adds to the app during deployment
Azure Key Vault
While the app should still use the old Key Vault values, Azure Key Vault must override the configuration from Altinn Studio. Ensure that the Azure Key Vault provider is registered after the call to ConfigureAppWebHost.
When the app should use the Altinn Studio-managed credentials:
remove or rename the old MaskinportenSettings--... Key Vault secrets
remove the Azure Key Vault setup entirely if the app does not use Azure Key Vault for anything else
Before proceeding with the manual setup, make sure you have access to Azure Key Vault for your organization.
This ensures that the keys created further on in the guide can be stored properly as secrets in Azure.
Start by logging into your account with your chosen method.
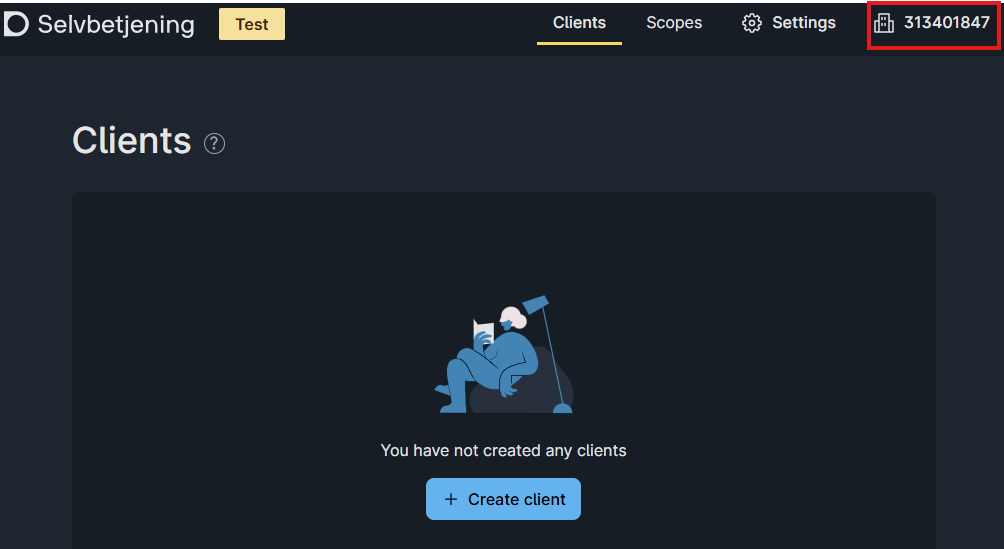
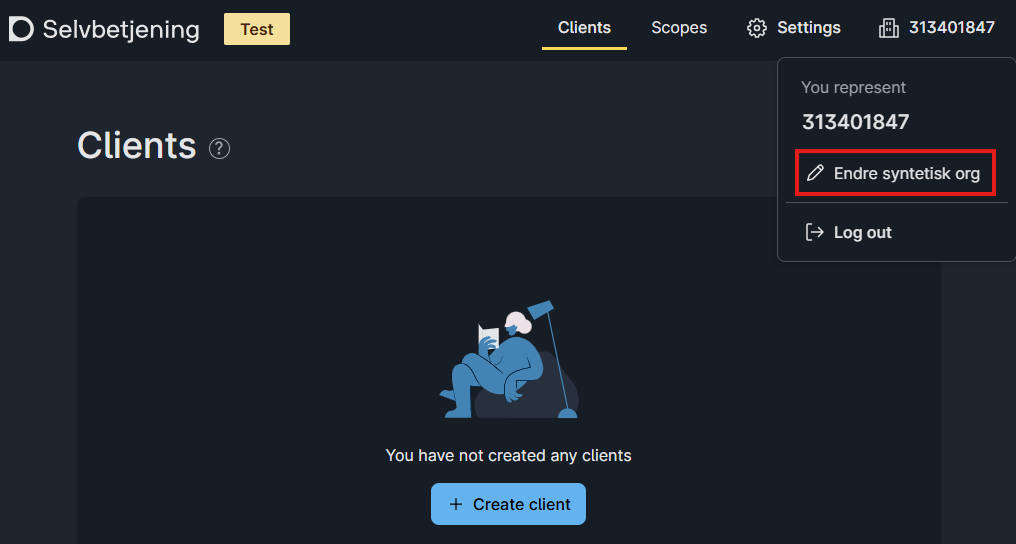
When logged into your account, the organisation you represent is shown in the top menu to the right.The organisation you represent is shown in the top menu.If you logged in to represent a synthetic organisation, you will also be able to change the synthetic organisation you represent in the drop down menu on that item.You can change the synthetic organisation you represent in the drop down menu.
Select the Create client button to start creating a new client for the organisation you represent.
On the Add client page select Maskinporten.
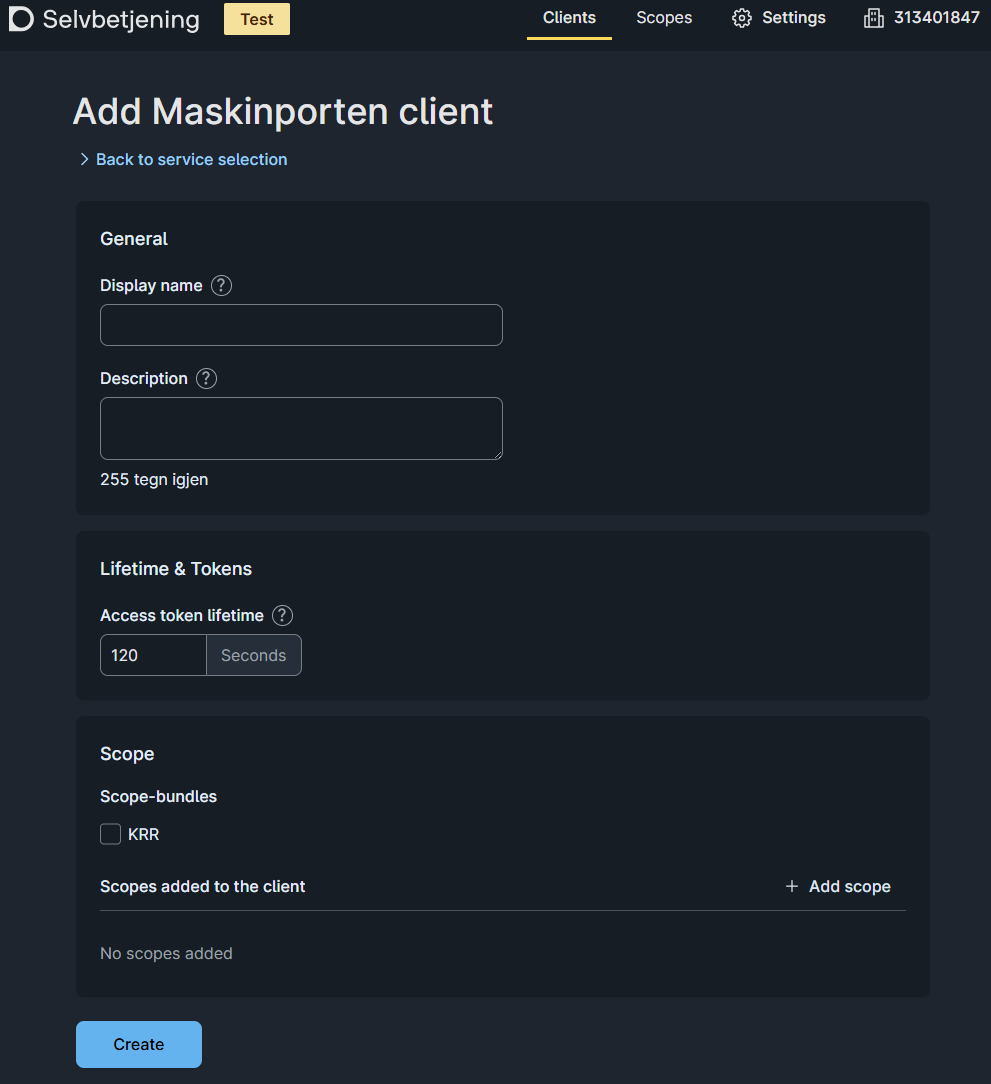
On the Add Maskinporten client page fill in the display name, description and add your required scopes (these values can also be changed later). Then click the Create button.The 'Add Maskinporten client' page.
You have now created a Maskinporten client for your organisation.
To use this client you need to add at least one authentication key. The client supports JWK and PEM keys.
Start by either locating an existing key or creating a new one. You can use the Altinn JWKS tool or other key generator of your choice for this.
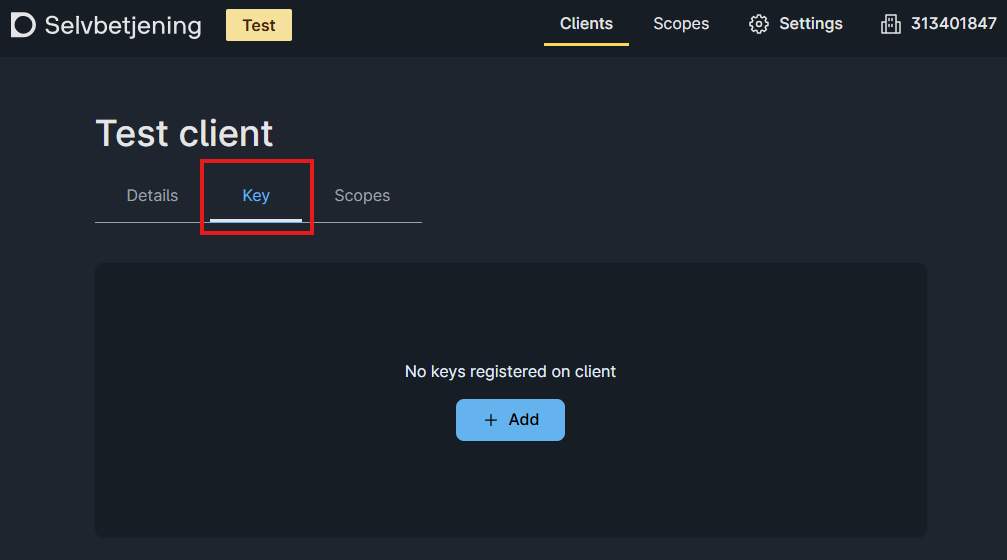
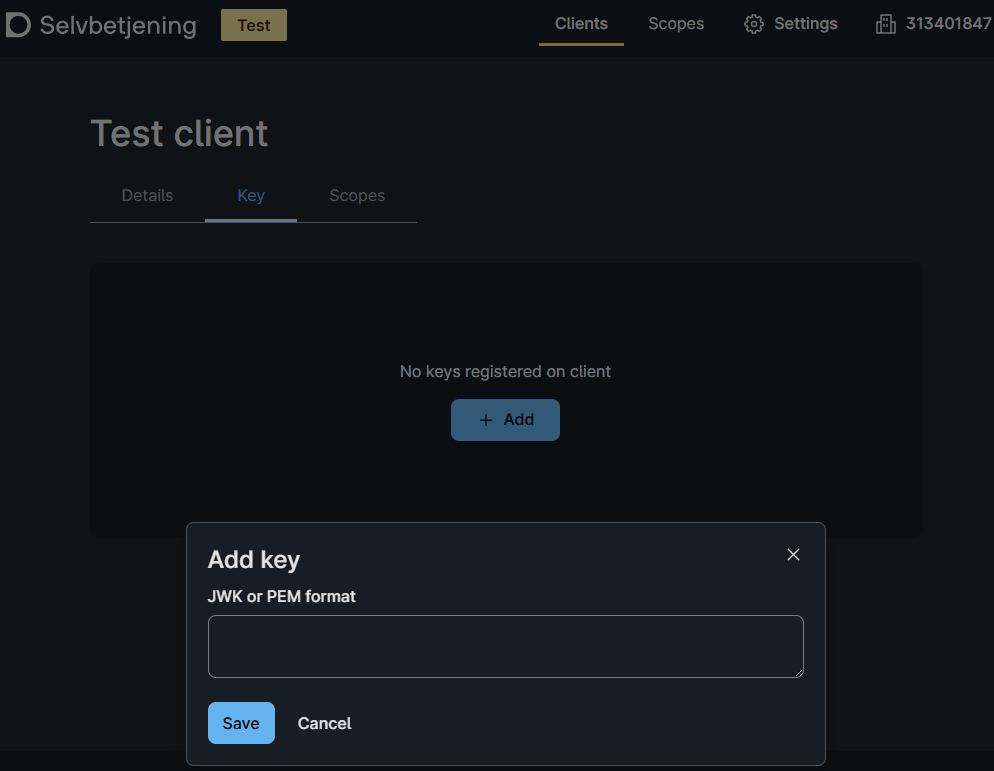
Next, navigate to the key section on your client page and select Add.Keys can be added in the key section.In the JWK or PEM format field paste your public key and click Save. The key is now added to the client.
Store your private key from your JWK or PEM in a secure location, as it is used to authorize the use of this client.
If you use Azure Key Vault to store your private keys, they need to be base64-encoded before uploading.The JWK or PEM public key is pasted in this field
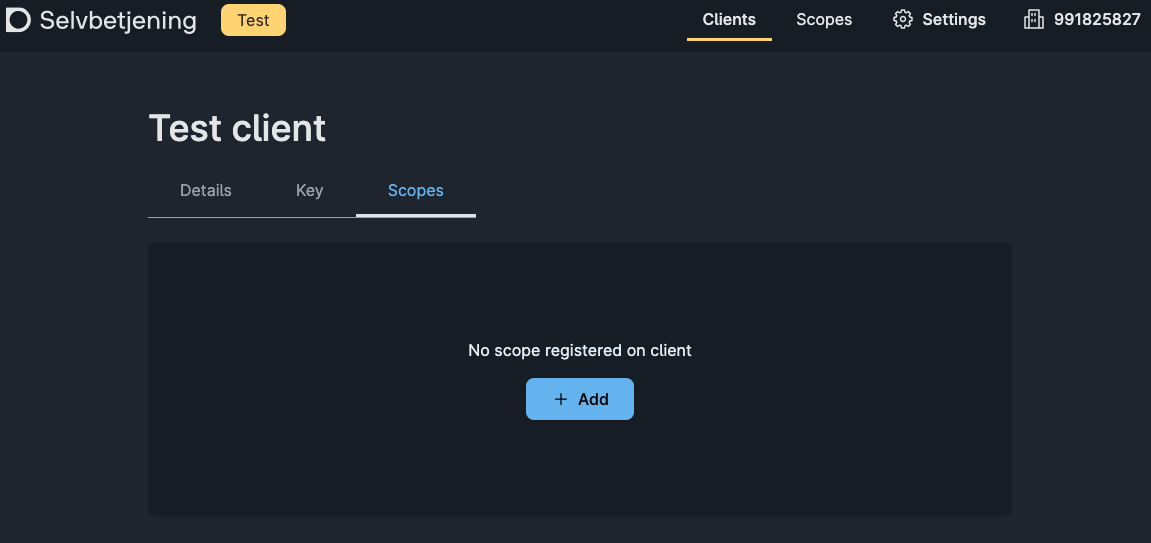
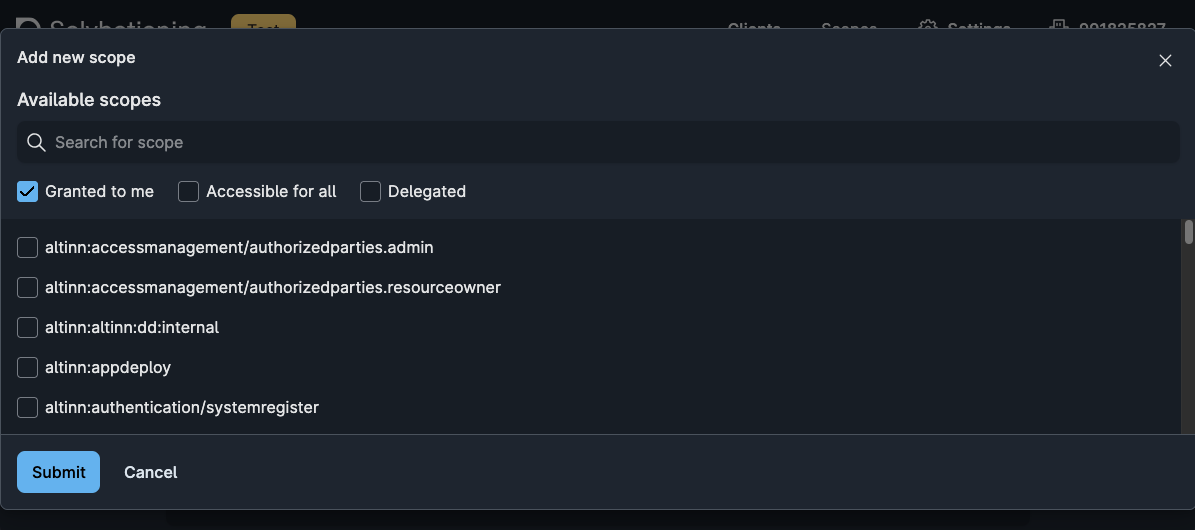
If you didn’t do so in step 5, you need to add the desired scopes to your client before it can be used.From the Scopes tab on your client definition, click the Add button.Scopes available to your organisation will be shown in the list. Select the required ones and click Submit.
Azure Key Vault Configuration
When preparing the application to use secrets from Azure Key Vault, there are some steps that need to be done:
Add the secrets retrieved during the Maskinporten client configuration to Azure Key Vault:
The base64 encoded JWT public and private key pair
The client ID for the integration
It is important that the name of these secrets in Azure Key Vault corresponds with the name of the section in the
appsettings file in the application repository. E.g. if your appsettings section for the Maskinporten integration section looks like this:
For the application to be able to read the secrets from Azure Key Vault, it needs to be configured to do so.
See the secrets section to achieve this.
Add the appsettings section example from above into the appsettings.{env}.json file.
Note: The secrets are read by the application on launch, so if you make changes after the application is deployed, you will need to redeploy the application for them to come into effect.
Key Vault Configuration
Lastly, we need to add the Azure Key Vault configuration provider to our host. This is done by adding the highlighted code after the ConfigureWebHostBuilder method.
Certain legacy services require an implementation of IMaskinportenTokenProvider to retrieve access tokens. The MaskinportenClient will automatically register this service if it has not already been supplied elsewhere.
Altinn.ApiClients.Maskinporten
If you need to support existing usage of the standalone Maskinporten client, while simultaneously wanting to use the built-in client for new features, it usually makes sense to leverage a single legacy manual setup.
The example below illustrates how to map an Altinn.ApiClients.Maskinporten.Config.MaskinportenSettings object to the format required by the built-in client.
App/Program.cs
using Altinn.App.Core.Features.Maskinporten.Exceptions;
using LegacyMaskinportenSettings = Altinn.ApiClients.Maskinporten.Config.MaskinportenSettings;
// ...void RegisterCustomAppServices(IServiceCollection services, IConfiguration config, IWebHostEnvironment env)
{
// ...var legacySettings =
config.GetSection("Maskinporten-Config-Path").Get<LegacyMaskinportenSettings>()
?? thrownew MaskinportenConfigurationException("Maskinporten settings not found in config.");
services.ConfigureMaskinportenClient(options =>
{
options.ClientId = legacySettings.ClientId;
options.JwkBase64 = legacySettings.EncodedJwk;
options.Authority = legacySettings.Environment switch {
"prod" => "https://maskinporten.no/",
"test" => "https://test.maskinporten.no/",
"dev" => "https://maskinporten.dev/",
_ => thrownew MaskinportenConfigurationException($"Unknown Maskinporten environment value {legacySettings.Environment}")
};
});
// More information about the Maskinporten environment mapping:// https://github.com/Altinn/altinn-apiclient-maskinporten/blob/main/src/Altinn.ApiClients.Maskinporten/Services/MaskinportenService.cs#L343}
If your MaskinportenSettings is configured in Key Vault, the mapping described in this step needs to take place either lazily or after Key Vault has been added as an options provider. If the configuration delegate runs too early, not all values are loaded yet.
In this section you will find couple of brief examples of how to migrate your existing configuration from the standalone Maskinporten client to the built-in one.
Use of AddMaskinportenHttpClient
The following example shows how an EventSubscriptionClient has traditionally been configured, and how you can achieve the same result using the built-in Maskinporten client.
The following example shows how Altinn.ApiClients.Dan has typically been configured, and how you can achieve the same result using the built-in Maskinporten client.